Siv3D でハッカソン
この記事はSiv3D Advent Calendar 2016の記事 (12/06) です.
概要
私の所属しているサークルの夏合宿でSiv3Dを使った2日間のハッカソンを行いました. そして,成果物を大学祭で展示しました.
内容
Siv3Dを利用すると様々な機能を手軽に実装できます. リファレンスはまだ十分ではありませんが, 分かりやすい命名やサンプルのおかげで開発は容易です. 今回は2日間の中で, Siv3Dの様々な機能を組み合わせたゲームを制作するために, 次の内容を実施しました.
- プログラマに必要な基礎的な体力及びプログラミング力を向上する為の基礎トレ
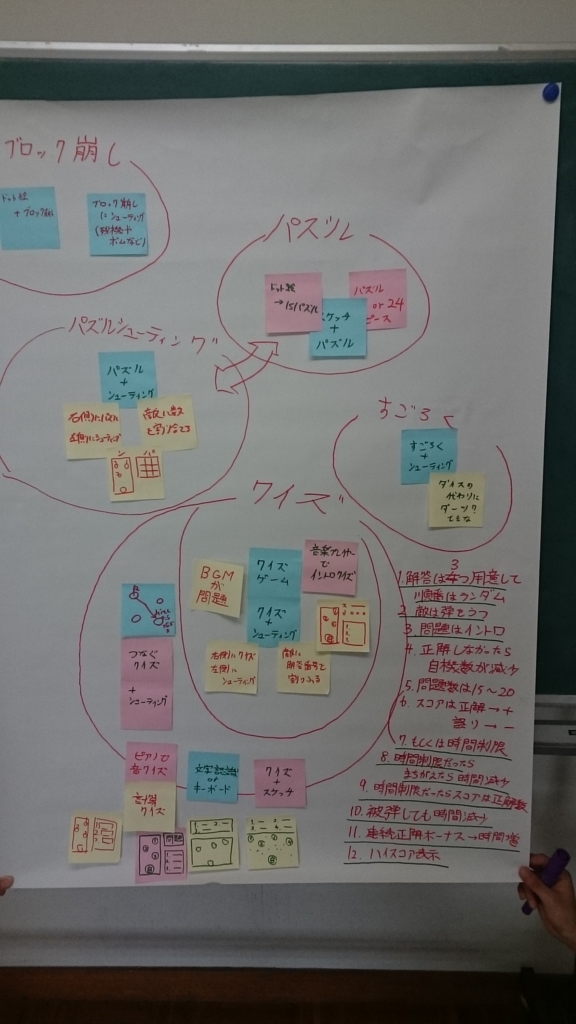
- 1日目:ブレインストーミングによるアイデア想起
- 2日目:アイデアに基づいたアプリ開発
行程
一日目
| 時間 | 内容 |
|---|---|
| 7:00 - 7:30 | 朝ごはん食べつつ開会式,フレンチトーストを用意する |
| 7:30 - 8:00 | ウォームアップ(ラジオ体操,ストレッチ) |
| 8:00 - 8:30 | 腕立て:30回,腹筋:30回,背筋:30回,スクワット:30回,外周1km |
| 8:30 - 10:00 | フレンチトースト食べながらACM-ICPC過去問 |
| 10:00 - 12:00 | ブレインストーミング |
| 12:00 - 13:00 | お昼,気まぐれパスタ |
| 13:00 - 14:00 | アイデアのまとめ,発表準備 |
| 14:00 - 15:00 | アイデア発表 |
| 15:00 - 18:00 | プロトタイプ制作 |
二日目
| 時間 | 内容 |
|---|---|
| 7:00 - 7:30 | 朝ごはん食べつつ開会式,フレンチトーストを用意する |
| 7:30 - 8:00 | ウォームアップ(ラジオ体操,ストレッチ) |
| 8:00 - 8:30 | 腕立て:30回,腹筋:30回,背筋:30回,スクワット:30回,外周1km |
| 8:30 - 10:00 | フレンチトースト食べながらACM-ICPC過去問 |
| 10:00 - 12:00 | 開発 |
| 12:00 - 13:00 | お昼,気まぐれパスタ |
| 13:00 - 16:00 | 開発 |
| 16:00 - 17:00 | 発表準備 |
| 17:00 - 18:00 | 発表&閉会式 |
| 18:00 - | カレーパーティ |
成果
ハッカソンを行った結果以下の3つの作品が誕生しました.
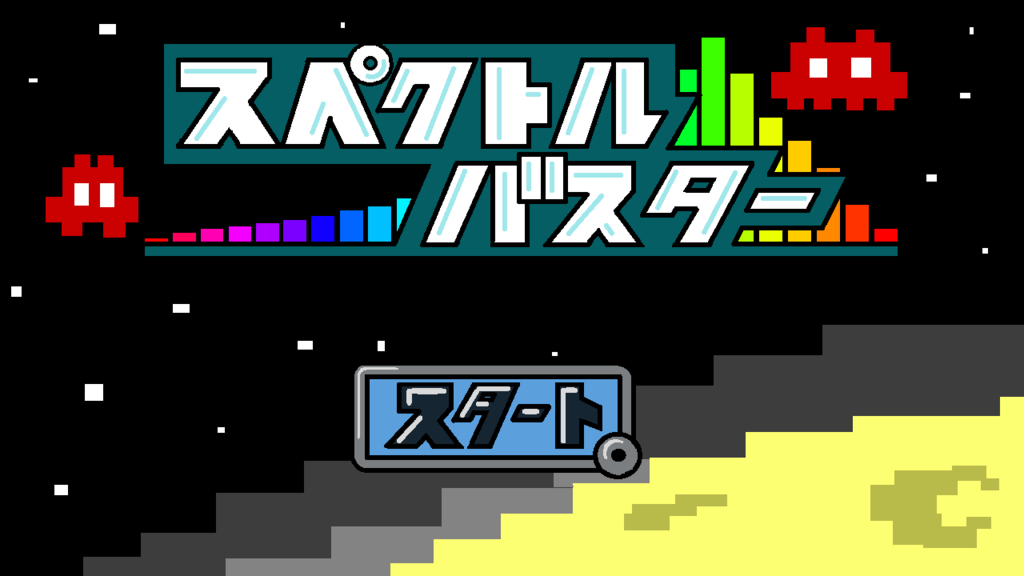
スペクトルバスター
| ブレインストーミング | タイトル | プレイ画面 |
|---|---|---|
 |
 |
 |
どういうゲーム?
作ってみてどうだったか
グループでブレインストーミングした結果, こんな面白いアイデアを数時間で思いつくことができました. また, タイトル画像, ゲームシーン, そして, タイトルシーンとリザルトシーンで役割分担することで協力して開発することができました. Siv3DのFFTの機能と当たり判定の機能を組み合わせました. 声で敵を倒すという斬新なアイデアを1日でゲームにできました.
by Jumpaku
QuizShooting
| ブレインストーミング | プレイ画面 |
|---|---|
 |
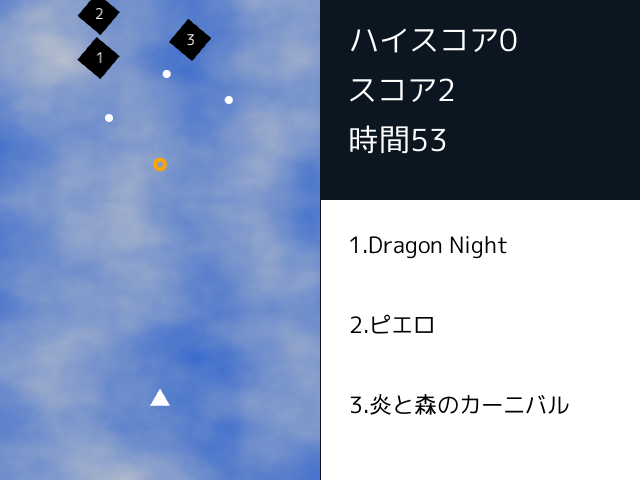 |
どういうゲーム?
このゲームはシューティングゲームとイントロクイズを融合した斬新なゲームです. ゲームが始まると曲が流れてプレイヤーと敵が3体現れます. 3体の敵には1,2,3の番号が割り当たっています. 画面の右には曲名が書かれた選択肢が3つあり,敵の番号と対応しています. 流れている曲の曲名が分かったら敵の弾を避けつつ正解の番号の敵に自機の弾を命中させます.
ルール
このゲームは敵の弾を避けながら流れている曲を聴いて正解の敵を撃つゲームです. 敵の球に当たったり間違った敵に弾を当てると時間が減っていきます. 正解していくとスコアが上がり時間切れまでにどれだけスコアを稼ぐかというルールになります.
作ってみてどうだったか
時間的な制約があったので既存のSiv3Dのテンプレートを改良できる形でアイデア出しを行いました. その結果できたのがQuizShootingです. シューティングゲームのテンプレートを改良する形でゲームを作りました. 曲を流して選択肢を付けたりするだけでなかなかの完成度のゲームを作ることができました. しかし,イントロクイズの部分はよくできましたがシューティングゲームの部分はもっと作りこみたかったなと思いました. 具体的に言うと敵からの弾をもう少し多く派手に出したいと思いました.
by うっひょい
ピタゴラスイッチ with 神の手
| ブレインストーミング | プレイ画面 |
|---|---|
 |
 |
どういうゲームか
作ってみて気が付いたのですが,これはピタゴラスイッチではありません. 自分で引いた線の上を球が走るので,それをゴールに運ぶといういたってシンプルなゲームです. ただし,LeapMotionを使用することで「神の見えざる手」を利用することができます. 「神の見えざる手」は球に対して外力を与えることができ,カオスなゲーム性を生み出します.
作ってみてどうだったか
Siv3Dの新しい機能であるBox2DやLeapMotionを使用したゲームを作ろうという目的で製作しました. 物理演算とモーションキャプチャという一見難しそうなものでも,Siv3Dを使うことで簡単に扱うことができました.
まとめ
- 出したアイディアを短期間で実装できた
- 新しいゲームが誕生し, 大学祭で展示できた
JavaFX Custom Control following MVC
概要 Abstract
コントロールはユーザが操作できるノードです. 標準で用意されているコントロールも沢山ありますが, 自分で実装したい時もあります. そんなカスタムコントロールを MVC 設計パターンに沿って実装してみました.
この記事では MVC 設計パターンについて沿ったカスタムコントロールの実装の仕方を曲線入力コントロールの例を用いて説明します.
Control is a node which user can manipulate. There are many standard controls. However, sometimes, you want to implement a control to customize its behavior. I implemented the custom control, following MVC design pattern.
With an example of CurveInputControl, this article explains how to implement custom controls following MVC.
MVC
JavaFX のドキュメントによると, Control は MVC 設計パターンに従っています. MVC 設計パターンは GUI アプリケーションの設計パターンの1つです. MVC は Model, View, Controller の頭文字です. Model は プログラムの機能を担い, 状態と状態を操作するメソッドを持ちます. View は UI を担い, ユーザの操作を認識し, また, 見た目を定義します. Controller は View からユーザの入力を受け取って Model のメソッドを呼び出します.
ユーザが UI 上で操作すると View のイベントハンドラが呼び出されます. これらのイベントハンドラの処理は Controller で定義されます. Controller で定義されるこれらの処理は Model のメソッドを呼び出します. Model は自分のメソッドが呼び出されると自分の機能を果たしてその結果を View に通知します. View は Model の通知を受けて見た目を変更します.
JavaFX では Control クラスが Model, Skin インターフェイスが View となっており, Controller に当たるものは公開されている API にはありません.
According to the document of JavaFX, Controls follow MVC (Model-View-Controller) design pattern. MVC design pattern is a design pattern of GUI application. Model manages functions of the program. It has its state and methods to change the state. View manages UI. View recognizes user manipulations, and defines how to render. Controller accepts inputs of user from the View, and calls methods of the Model.
When user manipulates on the UI, the event handlers of the View is called. These event handlers are defined by the Controller. They calls methods of the Model. Then, the Model performs its function, and notifies the result to the View. The View accepts the notification by the Model, and changes its appearance.
In JavaFX, Control class is the Model, and Skin interface is the View. There is no Controller in public API.
実装 Implementation
ここで用いる曲線入力コントロールの例はマウスドラッグで曲線を入力するコントロールです. 曲線は点列データで表されます. 1本の曲線が入力されると CurveInputEvent が発行されます. 曲線入力コントロールの onCurveInputDone プロパティのイベントハンドラがそのイベントを受け取ります.
An example of CurveInputView control is a control to input curve by dragging. Curve is presented with list of points. When a curve is input, CurveInputEvent is fired. A event handler onCurveInputDone property handles the event.
Model
コントロールは Model です. コントロールは Control クラスを継承して作成します. Control クラスの createDefaultSkin メソッドをオーバーライドして, コントロールに適用するスキンを生成するようにします.
Model であるコントロールの状態が変化した時はスキンに対して見た目の変更が必要である事を通知しなければいけません. まず, Control クラスの getSkin メソッドでスキンを取得します. Control クラスの getSkin メソッドを呼び出すとコントロールに適用されているスキンを取得できます. 次に, スキンの UI 変更メソッドを呼び出して描画に必要なデータを渡します.
Control is the Model. Inheriting the Control class, you write custom control. Override createDefultSkin method so that creates skin for custom control.
When state of control as Model is changed, control must notify skin that it must change its appearance. First, get the skin of the control calling the getSkin method of the Control class. And, call the rendering method of the skin with data to use on redering.
onCurveInputDone
プロパティを定義する時はプロパティ本体のフィールド, Setter, Getter, そしてプロパティを返すメソッドを作成します. SimpleObjectProperty コンストラクタの第1引数はそのプロパティを保持するオブジェクト, 第2引数はプロパティ名文字列, そして, 第3引数はプロパティが保持する値の初期値です.
SimpleObjectProperty クラスの invalidated メソッドはいままでプロパティが保持していた値が無効になった時に呼び出されます. 例えば, 別の値が設定された時や, 別のプロパティをバインドした時です. onCurveInputDone プロパティでは今まで保持していたイベントハンドラが無効になった時に, 新しく保持するイベントハンドラをコントロールのイベントハンドラに設定し直しています.
When you define a property, you must write field of the property, setter, getter, and Property getter. The first argument of the constructor of SimpleObjectProperty class is the object which has the property, the second argument is a property name string, the third argument is initial value for the value the property has.
invalidated method of SimpleObjectProperty is called when the value the property has is invalidated. For example,the method is called when different value is set as the value the property has, or when the property binds different property. When the event handler which onCurveInputDone property had is invalideted, onCurveInputDone property resets the new event handler as an event handler of the custom control.
Source code
Control クラスを継承した CurveInput クラスで Model の実装を行ったものが次の CurveInput です.
The following CurveInput is a class which is the Model and extends Control class.
View
View は Skin インターフェイスを実現して作成します. Skin インターフェイスには getNode メソッド, getSkinnable メソッド, そして dispose メソッドがあり, 全てをオーバーライドしなければいけません. コントロールの見た目を Skin インターフェイスで実現する時は, シーングラフを組み立てて SKin で保持します.
Implementing Skin interface, you write View. You must override getNode method, getSkinnable method, and dispose method of Skin interface. When implementing skin, you assemble scene graph that defines the appearance of the custom control.
getNode
スキンではシーングラフを組み立ててコントロールの見た目を定義し, そのルートノードを保持します. そして, Skin インターフェイスの getNode メソッドをオーバーライドして, スキンが持つシーングラフのルートノードを返すようにします.
コントロールを JavaFX アプリケーションのシーングラフに追加すると, ウィンドウを表示する時に, コントロールのcreateDefaultSkin メソッドが呼び出されます. このメソッドによって生成されたスキンは, コントロールに割り当てられます. この割り当て処理を行う時に, そのスキンの getNode メソッドが呼び出されます. そして, このメソッドが返すノードがコントロールの子ノードに追加されます.
Skin has the root node of the scene graph defines appearance of the custom control. And, you must override getNode method so that returns the root node.
If the control object was added to the scene graph of the JavaFX application, when the window is shown, createDefaultSkin method of the control is called. Next, getNode method of the skin is called and the node returned by the method is added to children of the control. These are how to apply the skin to the control.
getSkinnable
Skin インターフェイスの getSkinnable メソッドをオーバーライドして, スキンの適用対象のコントロールを返すようにします. 従って, スキンは適用対象のコントロールを保持します.
You must override getSkinnable method so that it returns the control which is applied this skin. This is the reason why skin has the control.
dispose
Skin インターフェイスの dispose メソッドは Skin が不要になった時に呼び出されます. もし必要なら, C++ のデストラクタの様にリソースの解放も行えます. このメソッドを呼び出した後は getNode メソッドと getSkinnable メソッドは null を返さなければいけません. このメソッドをオーバーライドして, スキンが保持するコントロールとシーングラフのルートを null にしてリソースを解放するようにします.
dispose method of Skin interface is called when skin is disused. This method looks like destructors of C++. With this method, you can release resources in the skin. After this method is called, getNode method and getSkinnable must return null. Overriding this method, you set the control the skin has and root node to null, and release resources.
レンダリングメソッド rendering method
Model の状態が変化した時, Model から見た目の変更が必要であると通知されます. この時, Model からスキンの UI 変更メソッドが呼び出され, 描画に必要なデータが渡されます.
When the state of the Model is changed, the Model notifies that it is required to change the UI. At this time, the Model calls rendering method of the skin and gives data for rendering.
Source code
Skin インターフェイスを実現した CurveInputSkin クラスで View を実装したものが次の CurveInputSkin です.
The following CurveInputSkin is a class which is the View and implements Skin interface.
Controller
コントローラは公開されている API にはありません. コントローラは fxml のコントローラと同様に作成できます.
コントローラ内にイベントハンドラを作成します. スキンの中で, スキンのシーングラフを構成するノードにこのイベントハンドラを登録します. コントローラのイベントハンドラは View からの入力に応じて, Model のメソッドを呼び出して, Model を操作します. 従って, コントローラはコントロールを保持します.
There is no controller in public API. The controller is similar to controllers of fxml.
In the controller class, event handlers are defined. These event handlers are registered to corresponding nodes in the scene graph of the view in skin class. Calling the methods of the Model depending on input from the View, event handlers manipulates the Model. This is Why controller has the Model.
Source code
イベントハンドラを定義したコントローラが次の CurveInputController です.
The following CurveInputController is a class which defines event handlers.
Event
Source code
曲線入力イベント発生時の点列データを保持するイベントクラスを実装したものが次の CurveInputEvent です.
The following CurveInputEvent is a class which has points data at the time the CurveInputEvent was fired.
クラス図 Class Diagram
今回作成する主なクラスの継承関係を次のクラス図に示します.
The following class diagram shows inheritance relations between primary classes.

流れ Flow
コントロールが表示されるまでの流れを次のシーケンス図に示します.
The following sequence diagram shows how the control is displayed.

イベントが処理されるまでの流れを次のシーケンス図に示します.
The following sequence diagram shows how the event is handled.

動作確認 Test
次の Main クラスで, 作成した CurveInput クラスを使ってみます.
I tested whether the custom control works with the following source code.
このウィンドウが表示されました.
The following window was displayed.

また, 次の出力がされました.
And, the following is the output.
Handled CurveInputEvent.
points.size() == 304
きちんと動きました.
It looks that the program works well.
反省と展望
最初は Skin の getNode のノードがどんなノードを返せば良いのか, Control のどのメソッドをどうオーバーライドしたら良いのか, 分かりませんでした. プログラムが見えない所でどう動いているのかを知るのは難しかったです. 私が解釈している MVC に沿って, きちんと動くコントロールを作成できたと思います.
次は fxml で作ります.
I couldn't understand what node should I return at getNode of Skin, and what method should of Control class I override. It was difficult to know how objects work. However, following the MVC that I understood, I could make the custom control which works well.
I am going to make a custom control with fxml.
JavaFX Simple Sketch
ソースコード Source Code
ドラッグで入力された点を直線で繋いで曲線を描くプログラムです. ユーザはマウスのボタンを押し, ドラッグし, そして離すことで点を入力します.
Using polyline of dragged points, this program draws curves. To input points, you press a button of mouse, drag the mouse, and release the button of the mouse.

説明 Explanation
main で launch を呼び出されると InputLine オブジェクトが生成され, start が 実行されます.
24行目から28行目まででは次のように canvas のイベントハンドラが設定されます.
- マウスが押された時 : previous に始点を設定する.
- マウスがドラッグされた時と離された時 : drawLine を呼び出す.
31, 32行目では canvas をウィンドウに貼り付けて, それを表示しています.
35行目の drawLine は今回のマウスイベントの位置を取得し, 前回の点から strokeLine を利用して線分を伸ばします. その後, 今回の点を保存します.
When launch in main is called, start of new InputLines object is called.
From line 24 to line 28, event handlers of canvas are set as follows;
- When mouse is pressed, previous is initialized by beginning point.
- When mouse is dragged or released, drawLine is called.
Line 31 sets canvas to the window and line 32 shows that.
Using strokeLine, drawLine at line 35 draws line from the point of current mouse event to previous point. After that, save current point.
なんとなクエスト IndistinQuest


"直感とセンスで弱点を見極めろ!!!"
"Find enemy's week point with your feeling!!"
ダウンロード DOWNLOAD
Releases · IndistinQuest/Game · GitHub
紹介 Description
我々は "なんとなクエスト" というゲームを作りました. このゲームはコマンド選択型の戦闘をするゲームです. エネミィの画像と説明文からなんとなく弱点を見極めて, コマンドを選択してください. 倒したエネミィの数と残り時間からスコアが算出されます.
We released a game "なんとなクエスト". This is a command selection battle game. Watch enemy's illustration and reed description. Find enemy's week point with your feeling and select attack command. After battles, your score is calculated using the number of defeated enemies and time.
ゲーム情報
- タイトル : なんとなクエスト
- 作者 : なんとなクエスト プロジェクト (雄洋, HataG, Namba, Jumpaku, うっひょい)
- ジャンル : コマンド選択型戦闘
- プレイ時間 : 10分程度
- プラットフォーム : Windows
- リリース : 2016年 10月 01日
- 言語 : 日本語
- 利用ライブラリ : Siv3D
Information
- Title : なんとなクエスト (IndistinQuest)
- Developers : なんとなクエスト プロジェクト (雄洋, HataG, Namba, Jumpaku, うっひょい)
- Genle : command selection type battle
- Playtime : about 10 minutes
- Platform : Windows
- Released on : October 1, 2016
- language : Japanese
- Library : Siv3D
遊び方 How to play
ゲームを始めるには"なんとなクエスト.exe"を実行して"START"ボタンを押してください. 詳しいルールはゲーム内の"RULE"を見てください.
To start the game, execute "なんとなクエスト.exe", and press "START" button. To see detail rule, press "RULE" button on title scene.
リンク Link
- ダウンロード Download - Releases · IndistinQuest/Game · GitHub
- ソースコード Source Code - []
スペクトルバスター Spectrum Buster
"恥ずかしさをかなぐり捨てろ!!"
"Don't be shy!!"
ダウンロード DOWNLOAD
スペクトルバスター.zip - Google ドライブ
経緯 Proccess
サークルの合宿でアイデアソン, ハッカソンをしました. 我々はSiv3DのFFTの機能を利用して簡単なゲームを作成しました.
We held an ideathon and a hackathon. With FFT of Siv3D, we developed a simple game.
紹介 Description
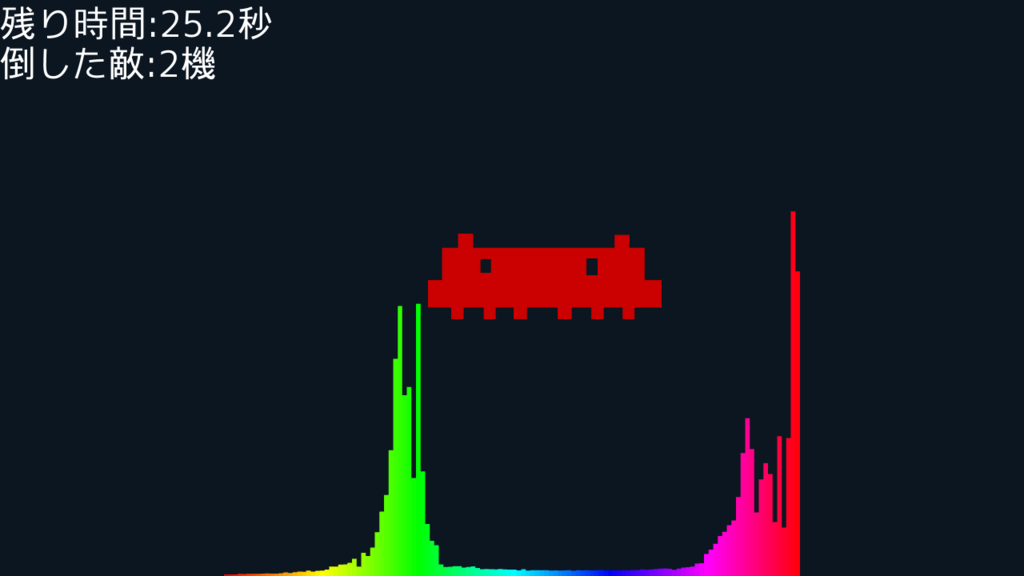
音声をフーリエ変換して, 周波数スペクトルを敵に当てるゲームです. プレイヤは220Hz~880Hzの声を出してください. 左の敵には低音, 右の敵には高音を出しましょう. また, 上の敵には大きな声を出しましょう. 制限時間は30[s]です.
恥ずかしさをかなぐり捨ててできるだけ沢山の敵を倒してください.
Shoot enemies with frequency spectrum of your voice. Input your 220Hz~880Hz voice. To buster left enemy, input low-pitch sound. To buster right enemy, input high-pitch sound. To buster above enemy, input megavolume sound. Time limit is 30[s].
Don't be shy and buster many enemies!!!
ゲーム情報
- タイトル : スペクトルバスター
- 作者 : MPC (室蘭プログラミングクラブ) 合宿DE合宿 2016 チーム3
- ジャンル : FFTシューティング
- プレイ時間 : 30s程度
- プラットフォーム : Windows
- リリース : 2016年 9月 18日
- 言語 : 日本語
- 利用ライブラリ : Siv3D
Information
- Title : Spectrum Buster
- Developer : MPC (Muroran Programming Club) "合宿DE合宿 2016 Team 3"
- Genle: FFTSTG
- Playtime : 30s
- Platform : Windows
- Released on : 2016年 9月 18日
- language : Japanese
- Library : Siv3D
リンク Links
- MPC (室蘭プログラミングクラブ (Muroran Programming Club)) - Muroran Programming Club
- ダウンロード Download - スペクトルバスター.zip - Google ドライブ